Monday, July 21, 2014

Crockpot Chicken Tortilla Soup

Crockpots & soups are two things people (those people who cook that is) typically associate with fall and winter.  However, in our home we eat soup all the time.  Paired with a nice salad or slice of bread and you've got a light summer dinner!  Plus, soups are a great way to pack in the vegetables.  A few weeks ago I made a hearty vegetable soup with ground venison (think Campbell's Vegetable Beef in a can, but homemade & fresh).  Jess couldn't get enough AND it was only 3 WWP+ per cup!  It was so filling I only ate about a cup and a half of soup, so you could go ahead and say it is a winner. 


This is a classic and a favorite for us.  It combines our love of soup, spicy things, and an excuse to use tortilla chips!  Not that it would ever be an issue for us serious carnivores, but it would be easily converted to vegetarian by removing the chicken (you could add more beans or tomatoes if you wanted) and replacing the chicken broth with vegetable broth or stock. 

Now, any extras you may throw on here are not calculated in the points per serving.  So before you go crunching up those chips or adding some sliced avocado, make sure you're not throwing off your healthy eating.  And if you aren't tracking WW points: I'M JEALOUS! 

Chicken Tortilla Soup - 7 WWP+ per serving, makes about 6 servings
Ingredients
1 large Onion, diced
3 cloves Garlic, minced
1 TBSP Olive Oil
2 TSP Chili Powder
1 TSP Oregano
1 dash Cayenne
28 oz Crushed Tomatoes
10.5 oz condensed Chicken Broth
4 oz diced Green Chiles
2 large Chicken Breasts
2 cups Corn (fresh, frozen, canned, whatever)
15 oz Black Beans, rinsed and drained
Ignore the line of cornstarch on the counter...sorry! Ha

Heat olive oil in pan over medium-low heat.  Add onion and cook until soft and translucent, 5-7 minutes.  Add garlic and cook for about 1-2 more minutes.

Combine onions, seasoning, tomatoes, chicken broth, and green chiles in crockpot. Place two chicken breasts in middle. Cover and cook on low about 4-5 hours.


Remove chicken and shred. 

Return chicken to crockpot.  Add corn and black beans.

Allow to heat up thoroughly, about 30 minutes or so.  Serve! 

You can add cheese, chips, avocado, diced tomatoes, really whatever you like!

Sunday, July 13, 2014

Creamy Chicken & Green Chile Enchiladas

**So I came across some old photos & write-up of enchiladas that I forgot to post about...oops!  So here they are, um, they're not healthy.  So, sorry about that, too!  They're like 9 WWP+ per enchilada...but they're good!

I love Mexican food - I think I've mentioned that before.  But seriously, I could eat chips & salsa every day and be a happy girl.  I recently made my own salsa, too!  Maybe someday I'll tell you about it, but I was too excited to finish that I didn't take photos or anything...I actually didn't even write down what I put in it, so that could get a little difficult to replicate.  Oh well.

So, here we have a recipe for cream cheese chicken enchiladas.  They were cheesy, creamy, slightly spicy, and delicious.  This recipe made enough for a whole family and they weren't that great reheated, so maybe in the future I'll halve it.  Other than that, I have no complaints.  I served it with my semi-homemade Spanish rice, chips & salsa, and had a nice little meal!

Ingredients:
5 oz reduced fat cream cheese, softened
1/4 cup light sour cream
10 oz enchilada sauce, I used Medium
1 cup shredded cheddar cheese
1 cup shredded monterey jack cheese
2 cups shredded chicken (I used dark meat)
1 small can corn
4 oz diced green chiles
1 tsp chili powder
1/2 tsp cumin
8 whole wheat tortillas
Salt & pepper

Preheat oven to 325 degrees F.  Lightly spray a 13x9" pan with cooking spray.  Spread 1/4 (which is about 1/4 cup) the enchilada sauce in the bottom of the pan.

In a large bowl, mix together cream cheese, sour cream, and 1/2 cup enchilada sauce.  Add 1/2 cup of each cheese.


In a different bowl, mix together chicken, corn, chiles, chili powder, and cumin.  Salt & pepper to taste.

Add chicken to the cheese bowl and mix well.

Fill each tortilla and roll up.  I laid all 8 tortillas out on the counter and spooned equal amounts of mixture into each one, it was easier than having not enough or too much left over at the end.

Place rolled tortillas in baking dish (seam down).  Pour remaining enchilada sauce over the enchiladas and sprinkle with remaining cheese.

Bake for about 20 minutes and you're done!  I started my rice after I put the enchiladas in the oven and they were finished about the same time, so it was perfect!

Monday, July 7, 2014

Honey Lime Shrimp

I love seafood and I have since I was a little girl.  Both of my parents lived in Florida when they were younger (that's where they met!), and we still have some family/friend ties, so I spent much of my childhood either near or literally in (yay for boats & stilt-houses!) the Gulf of Mexico. It still holds a special piece of my heart...I love the beach!  I digress.

So, seafood: I make tilapia a lot because it is cheap and super easy and fairly healthy.  However, sometimes I like to splurge on shrimp.  There is just something that seems so fancy when shrimp is served for dinner.  This recipe is simple, quick, and other than the shrimp and maybe a lime, you probably have everything you need right in the fridge/cabinet.  The first time I did a honey-lime recipe it was in fact tilapia, and Jess loved it!  For that you marinade filets in the same mixture, but then before you pan fry it you cover it with a bit of flour with salt & pepper.  Delicious.  Maybe some day I will show you. But today, it's just shrimp & roasted California vegetables.

Note about cooking with shrimp: for this recipe I used shrimp from the meat department at Kroger.  However, if frozen bags of shrimp are on sale, that is normally what I buy.  It just happened that the "fresh" (it is still actually frozen...) loose shrimp were cheaper.  What I do recommend any time you're cooking with shrimp is to make sure you get raw, not cooked.  Shrimp can get rubbery and overcooked extremely quick, so if you use pre-cooked and then try to heat it up you can easily go too far.  Shrimp is super easy to tell when it's done, too!  It turns that nice pink color.  So there you have it: fresh or frozen, but make sure they are raw!
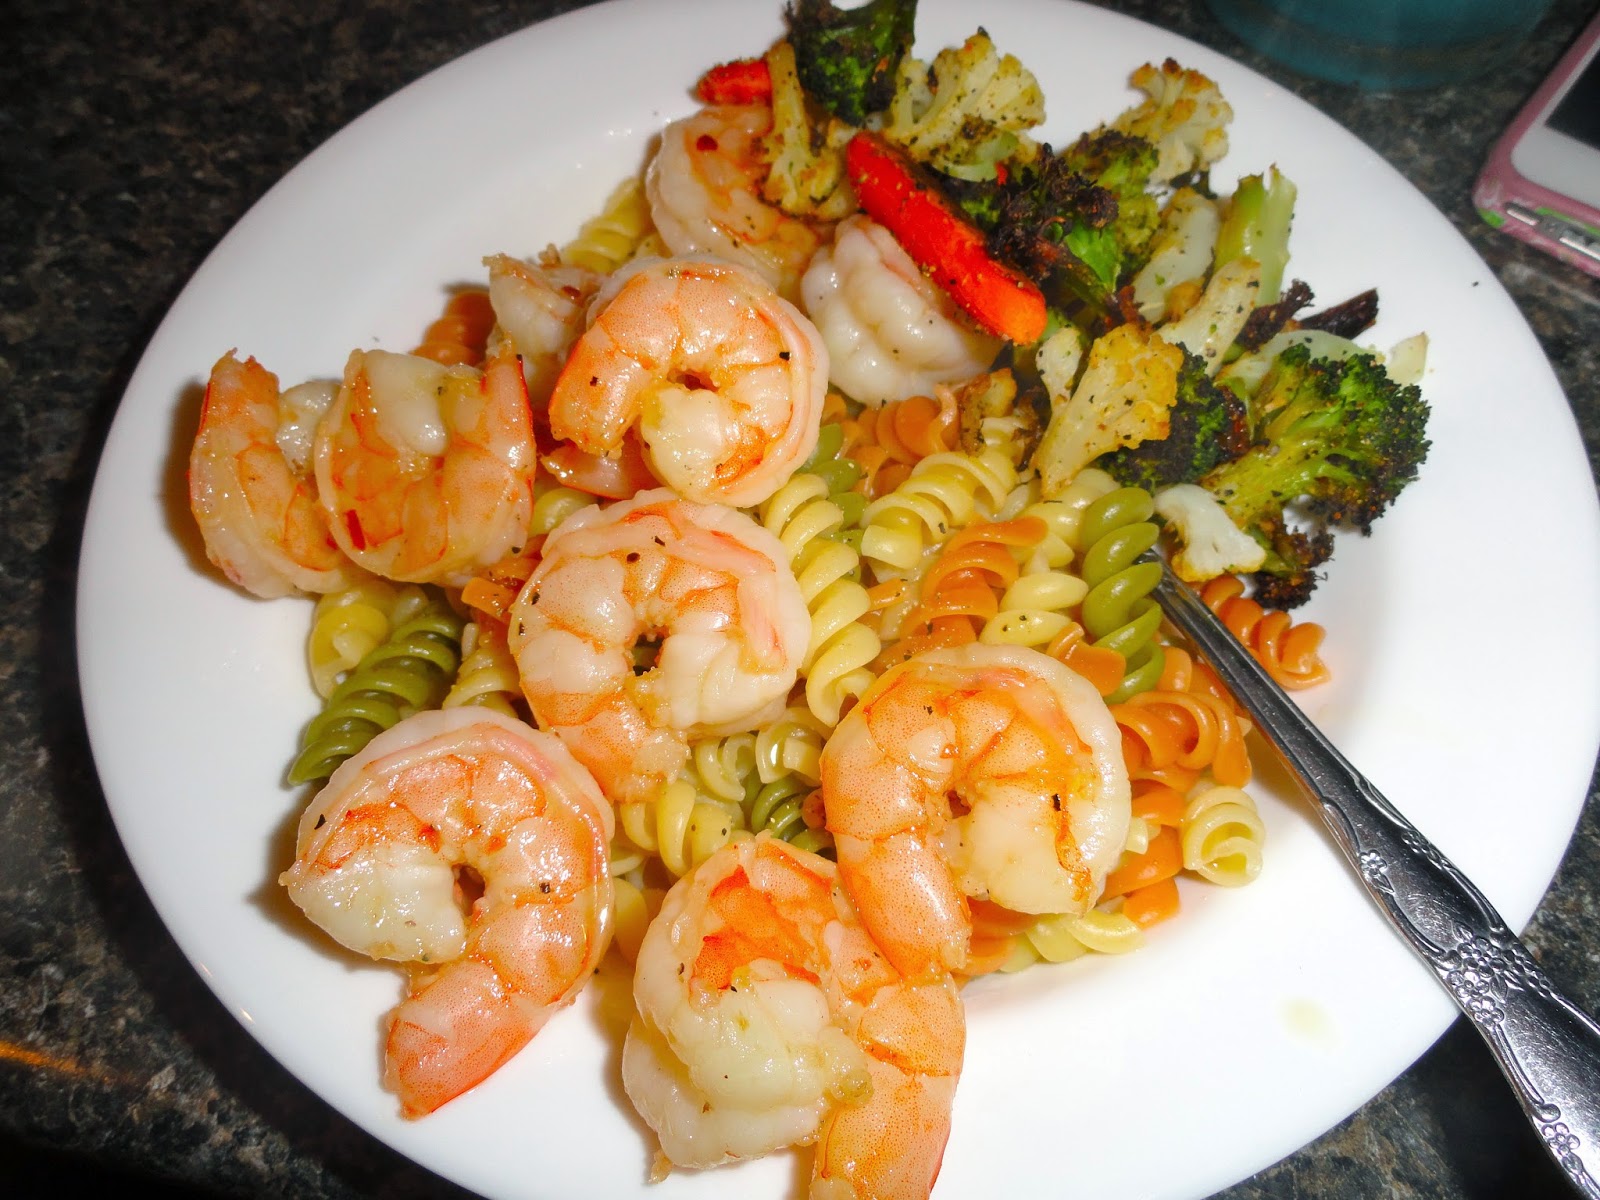
Jess got more food than me, so he got to eat his shrimp on a bed of pasta...ok, maybe I had a half cup, too! 
Honey Lime Shrimp - 9 WWP+ per serving, yields 2 large servings (1/2 lb each)
Ingredients
1 lb large shrimp, raw
4 TBSP Honey
1/2 cup Olive Oil
4 cloves Garlic, minced
Juice and Zest of 1 small Lime
1 TSP Salt
1/2 TSP Pepper
1/2 TSP Red Pepper Flakes
Not many ingredients! 
If your shrimp are frozen, thaw them out the day before or the same day by running cool (not hot, you'll cook the shrimp!) water over them in a strainer for about 5-10 minutes.

In a medium bowl, mix all ingredients except shrimp. 

Pat shrimp dry and add to the marinade, making sure they're all covered.  You may prefer to put them in a ziplock bag or a flat dish, whatever is easiest for you and allows all the shrimp to be covered with the marinade. 

Marinade in the refrigerator for 30 minutes to an hour, then set out on counter for about 10 minutes to bring to room temperature. 

Cook shrimp in a pan over medium heat until they turn pink, about 2-3 minutes. 
Not done, yet...

Finished! 
I served mine with roasted carrots, cauliflower, & broccoli.  If you want to use the marinade as a sauce, in a small saucepan add the marinade and bring to a low boil and then simmer for a few minutes until it reduces by about half.  You can add a little chicken broth if you need to add a bit of liquid.  Just make sure you make a reduction, because you've got raw shrimp juice hanging out in there.

I roasted the vegetables in the oven at 400F for about 30-40 minutes with some lemon pepper seasoning. 

Sunday, June 29, 2014

Crispy Wontons & Sauteed Green Beans

So much food, so little points! 
Asian-inspired menu ahead! 

Here is yet another WW recipe, with a few of my own alterations.  These little guys are fun and relatively low points, particularly when served with these sauteed green beans.  Not sure if I have used Venison in a recipe for my blog yet, but I am in this one.  Jess came out of last hunting season with about 40 pounds of ground venison, so I have been slowly working on making that dwindle.  If you've never cooked with it before I can let you know it is just really bland meat.  I don't think it tastes "gamey," but I normally mix it in with other things.  For example, I would never make a venison burger, there just isn't enough flavor, read: grease.  Venison is incredibly lean.  It rarely even needs drained.  However, if I'm making like meatballs for spaghetti sauce or something similar, sure I'll use it.  Or if I want to make something like salisbury steaks, I will mix it 50/50 with beef. 

This recipe was orginally made for Pork, so the point values are actually based on that.  So feel free to subsitute ground pork where I am using ground venison.  Deer isn't a meat you can generally buy at Kroger, hahaha.

Crispy Wontons - 1 WWP+ per wonton
Ingredients:
22 Wonton Wrappers
1/2 lb gound meat, browned and drained
2 medium Scallions
1 TSP Lemon Pepper seasoning
1 TBSP ground Ginger Root
1 clove Garlic
2 TBSP Soy Sauce
1/2 TSP Olive Oil
 (I forgot to take a photo of the ingredients...sorry!)

Preheat oven to 400 degrees F and line a baking pan with parchment paper.

In food processor, combine scallions, ginger root, lemon pepper seasoning, and garlic.  Pulse until finely chopped.


Add meat, soy sauce, and olive oil.  Pulse to combine.


This was probably a bit much for my tiny food processor...
Fill 20 wonton wrappers with heaping teaspoon of mixture and seal using water on your fingertips. 

Line on baking sheet and spray lightly with cooking spray.  Bake 3 minutes, flip, spray, bake another 3 minutes.   If they aren't crispy enough for you, you can bake another 1-2 minutes, just be careful not to burn them.


Sauteed Green Beans - 1 WWP+ per 1 cup serving
Ingredients:
1/2 lb Green Beans, ends snapped
1 TSP Olive Oil
1 medium Shallot, chopped fine
1 clove Garlic, minced
1 TBSP Parsley, dried
1 TBSP Lemon Juice
1/4 TSP Salt & Pepper

Steam green beans for 6-7 minutes.

Run under cold water to stop them from cooking, set aside.

In medium skillet or wok, heat oil and saute the shallot for about 5 minutes.  Add garlic and toss for about 30 seconds.

Add green beans to skillet and toss for 3-4 minutes.

Combine parsley, lemon juice, and S&P, mix into skillet. When you serve them, be sure to scoop up some of the onions and stuff that is in the pan, it really makes the green beans.

Seriously, so many green beans.  They're my favorite food! 

Thursday, June 26, 2014

Breaded Pork Chops & Creamed Spinach

Get ready for a classy, filling, and delicious dinner!  I love spinach and creamed is one of the ways I can get Jess to eat it.  Here we've got some pretty easy breaded pork chops and creamed spinach.  It took maybe 30 minutes start to finish, so it is an easy meal to whip together when you don't have a lot of time!
Check out that golden crunchy exterior! 
So part of our new healthy-eating plan includes me only cooking enough for one meal.  I used to have the leftovers-for-lunch philosophy, but I realized that I was just cooking too much and ending up eating too much for dinner.  So now, instead of fixing four pork chops for dinner and then lunch the next day, I only make 2, then we eat smaller meals for lunch.  Jess normally eats a roastbeef sandwich with an apple and some pretzels, I have been eating tuna and crackers or a spinach salad with fat-free balsamic dressing, the latter being zero points! What?? Crazy.

So Weight Watchers online is a great resource.  They have a ton of recipes that are from WW and also from other members like me.  They already have the point values calculated and even gives you serving sizes.  It's great.  That is where I got these recipes!  I usually try to keep dinner 10-15 points.  I get 26 per day, so even if I do have a 15 point dinner, I can still eat toast or cereal for breakfast, a salad for lunch, and some berries, pretzels, or popcorn for an afternoon snack and come in under my point maximum. 

Breaded Pork Chops - 7 WWP+ per chop
Ingredients:
2 Pork Chops (I used bone-in, you could use boneless)
1/4 cup Flour
1/2 tsp Salt & Pepper
1 Egg
1 1/2 TBSP Milk
1 TBSP Dijon Mustard
1/4 cup Panko Breadcrumbs
The larger chop is Jess's, that lucky duck gets to
eat more than I do! 

Preheat oven to 400 degrees F and line a pan with parchment paper or with aluminum foil.  If you use foil, spray lightly with cooking spray.

In medium bowl, combine flour, salt, & pepper.  In another bowl, lightly beat the egg and mix with milk and dijon.  Place Panko breadcrumbs in another shallow bowl or plate. 
My little battering station.
Dip chops in flour, shake off excess. 


Dip in egg mixture and let excess drip off. 

Cover with Panko by pressing gently. 

Place pork chops in pan and bake for 8 minutes. 

Flip over, bake another 5-7 minutes.
The parchment paper wasn't as burnt as it looks...
Creamed Spinach - 4 WWP+ per 3/4 cup serving
Ingredients
16 oz Spinach
1 TBSP Butter
1/2 cup Onion
1/2 TSP Salt
1 TBSP Flour
1/8 TSP Cayenne
5 oz Evaporated Milk
Spoiler alert: I didn't actually use the fresh spinach, but Jess hadn't come home from the store with
my frozen so I just used my fresh spinach I use for salads for the photo. 
Microwave spinach in covered bowl for about 8 minutes.

Meanwhile, melt butter in sauce pan over med-low heat.  Stir in onion and salt, cook about 10 minutes.

Add flour, cayenne, and evaporated milk.  Stir until thick and bubbly, about 5-7 minutes. 
Still pretty thin...
And we're thickened! 
Pour sauce into food processor and blend until smooth.
So, I couldn't actually get it completely smooth...whatever.
Mix with spinach, add salt & pepper to taste. 
My photo is a little steamy, sorry! 

Dish up and serve! Remember, each pork chop is only 7 WWP+ and 3/4 cup spinach is 4 points!
In the future, I may make another vegetable side-dish, but I ate slow so this filled me up. 

This is me apologizing.

I'm a terrible blogger. 

Clearly, I am one of those that think "I HAVE SO MANY IDEAS...I should start a blog," only to write 10 posts and forget about it.  I promise I still have stuff to write about, I just got so overwhelmed!  We've been traveling a little bit (nothing exciting), I've been working a little more (don't feel bad for me, it's not a lot), and...drumroll, please...I started a diet.

Well, I suppose you could call it a "lifestyle change."  But we will call it what it is: Weight Watchers. I very passively did WW with my Mom a few years ago while living at home for summer and I have to admit that it works.  So the last 6 months or so I have just felt generally unhealthy, sluggish, and lazy(?).  Now let me tell you, I don't work out.  I can't run because my knees are too weak and vulnerable, and honestly I am not one of those people who feel better after excercise.  I feel sweaty and tired and it isn't pleasant.  So, on a whim, I decided I needed to eat healthier and maybe I would feel better.  I also knew that without some kind of incentive, I probably wouldn't stick with it: insert paying for Weight Watchers. 

It has been two and a half weeks and I've got to admit, I feel great.  I've lost a few pounds, but more than that I feel better.  Dresses that haven't fit in a year not zip up with ease, my face looks thinner, and I feel better.  Along with my new healthy eating kick, I started taking an iron supplement because I've had chronically low iron for years.  Did you know that low iron can make breathing difficult?  Well it does.  Now I am more energized, I sleep better, and just generally feel better.  Such big changes!  So, women, if you are tired all the time, get winded easy (I would feel out of breath just walking down to the basement...), maybe go get your iron checked!  It is common in women to have low iron. 

So, new and improved Adventures with Jameson & Ginger Ale: Healthy(er?) recipes, re-evaluation of old recipes with points values added, portion control, healthy habit tips, along with fun craft stuff as it happens.  I have not forgotten about my sewing machine, but I've been working on a dress that is taking longer than I'd like.  So until that gets done, there probably won't be many sewing posts. 

Thanks again for paying attention to my ramblings, and sorry I suck at blogging.